I am always looking for new ways to use great food products-jam from Blue Chair Fruit, a local jam company here in Oakland, is one of them.
We were in Seattle a few months ago visiting friends. As a present for staying at our generous hosts house, we brought them Blue Chair Jam, needless to say they are powerfully impressed! If you can get your hands on any of their jams, count yourself very lucky! Each jam is handmade, crafted with skill and perfection. Rachel, the owner, sourcing everything locally, and seasonally. They are fantastic jams, and there really is no reason to buy any other sort of jam! Honestly!
Robyn and I got some fresh Salmon from Pike's Place and cooked up this dish. The kicker was using Blue Chair Fruit Plum jam! It really made this dish!
This dish can be made on the grill or barbeque. It works equally well if you have a broiler on your oven with a flame. I used my oven with the broiler. Make sure to re-position the tray in the oven so it is directly below the broiler, otherwise your fish will not caramelize properly.
Ingredients
Fresh salmon fillet (not a steak cut), cleaned and de-boned
Salt and Pepper
Blue Chair Fruit, Plum jam
2 lemons, sliced thinly
1/2 for juice
In an oven broiler
Place lemon slices on a cookie sheet. Lay the salmon on the lemon slices (this will prevent sticking). Adjust the rack so it is directly below the broiler.
Lay the fish on the lemon slices, skin side up and facing you. Salt and pepper the skin and place in the broiler.
Turn the broiler on HIGH. Cook for 2-3 minutes, until the skin is cooked and puffy, but not charred.
Place additional lemon slices on the cooked skin. Gently flip the fish, so the lemon slices are now on the bottom. The flesh of the fish should be on top, with lemon slices. Remove the lemon slices on top. Squeeze any remaining juice from the lemon slices on the fish and discard.
With a brush, gently spread the plum over the flesh of the fish. The heat of the fish should make the jam a little runny. Give it a good coating of jam. Salt and pepper the fish again.
Place the fish back in the broiler and cook for an additional 3-4 minutes, until the fish is cooked. I usually like my salmon slightly cooked, otherwise it gets too hard. You want the jam to caramelize a little.
On a barbeque grill
If you are using a grill, heat the charcoal until very hot. Lay the lemon slices on the grill in a rectangle pattern. Lay the fish on the lemon slices, skin side up and facing you. Salt and pepper the skin. Add some of the jam and gently spread it over the fish with a brush or butter knife. Cover and cook for 2 minutes. Gently flip the fish. Take advantage of the lemon slices, it will make it easier to flip the fish.
Cook for an additional 2 minutes, or until done.
Thursday, November 29, 2012
Tuesday, November 20, 2012
Pozole, Mexican Corn Soup
.JPG) This is a traditional soup that has been eaten for thousands of years in Mesoamerica. Pozole uses hominy, or dried maize kernals. Although the recipe can be made using regular corn kernals, it really helps if you can get hold of some hominy. Most Mexican stores will have them dried. You can also get some canned hominy, which eliminates the need to soak the hominy overnight. Either way, it is a delicious recipe and perfect for a cold winter night! Obviously, using homemade chicken stock imparts a delicious flavor.
This is a traditional soup that has been eaten for thousands of years in Mesoamerica. Pozole uses hominy, or dried maize kernals. Although the recipe can be made using regular corn kernals, it really helps if you can get hold of some hominy. Most Mexican stores will have them dried. You can also get some canned hominy, which eliminates the need to soak the hominy overnight. Either way, it is a delicious recipe and perfect for a cold winter night! Obviously, using homemade chicken stock imparts a delicious flavor.Ingredients
Olive oil
1/4 white onion, diced
2 garlic cloves peeled and whole
1/2-1 lbs chicken breast or thigh, diced
Oregano
Salt
pepper
2 Tomatoes, diced
Rich Dark chicken stock, 1/2 to 3/4 cup
Hominy, 1 cup dried or canned
Water
Avocado, sliced
Fresh lime juice
.JPG)
.JPG) When the onion and garlic release their aroma, add the chicken, oregano, salt and pepper.
When the onion and garlic release their aroma, add the chicken, oregano, salt and pepper.Stir fry for a few minutes until the chicken is white and no longer raw.
.JPG) Add the tomatoes, and give them a good stir, letting them
Add the tomatoes, and give them a good stir, letting themsweat out their juices.
.JPG)
Add the hominy and give it a good stir.
.JPG)
.JPG) Bring to a boil and reduce heat to low. Cover and cook for 10-15 minutes. Check the hominy after 15 minutes. If it is not cooked to your likeness, continue to cook in the liquid until the hominy is as soft as you want it. If you are using canned hominy, it has already been cooked, so you just need to cook for 3-5 minutes to heat up the hominy and distribute the flavors. If you are using regular corn, you don't have to cook the mixture for 15 minutes--it will probably be much less.
Bring to a boil and reduce heat to low. Cover and cook for 10-15 minutes. Check the hominy after 15 minutes. If it is not cooked to your likeness, continue to cook in the liquid until the hominy is as soft as you want it. If you are using canned hominy, it has already been cooked, so you just need to cook for 3-5 minutes to heat up the hominy and distribute the flavors. If you are using regular corn, you don't have to cook the mixture for 15 minutes--it will probably be much less.Serve with freshly squeezed lemon or lime, avocado, salt and pepper.
Friday, November 16, 2012
Spicy Mabo Tofu
.JPG) The first time I had Mabo Tofu was in Japan. I was studying abroad in Kyoto, and decided to make a visit to Kobe's Chinatown. It was cold and rainy, as many cities in Japan are in the winter. This dish really hit the spot-warm, spicy and delicious.
The first time I had Mabo Tofu was in Japan. I was studying abroad in Kyoto, and decided to make a visit to Kobe's Chinatown. It was cold and rainy, as many cities in Japan are in the winter. This dish really hit the spot-warm, spicy and delicious.Mabo Tofu is a Japanese take on a Sichuan dish. Tofu is stir fried with leeks, ginger, garlic and tomatoes. The Sichuan original has the addition of fermented black beans, which are quite tasty, but I can never seem to motivate to cook them. Some preparations can overdo it with the sesame seed oil, but a good Mabo Tofu should not be oily.
I replaced the beef with ground turkey, I found it to be a little cheaper (and healthier!). This dish is great by itself, with freshly cooked rice or with noodles!
Ingredients
Meat Mix
1 lbs ground meat (Turkey, lamb or beef)
3 tablespoons brandy
2 tablespoons soy sauce
1 teaspoon cornstarch
1 tablespoon vegetable oil
Vegetable Mix
Raiyu (Chinese Hot Chili Oil)
Sichuan Peppercorn Oil
Dried Mikan from the Raiyu, sliced
Leek, minced 5 tablespoons
Ginger, peeled and minced 2 tablespoons
Garlic minced 1 tablespoon
1/2 teaspoon roasted Sichuan peppercorns
3 tomatoes, skin removed, diced
1/2 cup fish stock
3 teaspoons Morrocan Ketchup or regular ketchup mixed with 1 teaspoon harrisa
1/4 teaspoon paprika
1/8 teaspoon Korean Chili Pepper
Tofu, cut into cubes
Garlic minced 1 tablespoon
1/2 teaspoon roasted Sichuan peppercorns
3 tomatoes, skin removed, diced
1/2 cup fish stock
3 teaspoons Morrocan Ketchup or regular ketchup mixed with 1 teaspoon harrisa
1/4 teaspoon paprika
1/8 teaspoon Korean Chili Pepper
Tofu, cut into cubes

Heat the Raiyu and Sichuan peppercorn oil in a wok until very hot, but not smoking. When their aroma is released, add the ground meat and stir fry for several minutes until the meat is no longer pink. Remove the meat.
.JPG)
.JPG) Add more Raiyu and Sichuan peppercorn oil to the wok. Stir fry the leek, ginger, garlic and peppercorns for several minutes, until the leeks is cooked through.
Add more Raiyu and Sichuan peppercorn oil to the wok. Stir fry the leek, ginger, garlic and peppercorns for several minutes, until the leeks is cooked through.Add the tomatoes and stir fry for a few minutes until the tomatoes begin to sweat and break down. Add the fish stock, Morrocan Ketchup, paprika and chili powder. Stir to incorporate. Taste. Add additional paprika and chili powder to taste. Add the cooked meat back into the wok.
Add the tofu, cover and reduce the heat to low. Cook on low heat for 15-20 minutes, or until the tofu is cooked through.
Serve with cooked rice!
Friday, November 9, 2012
Roasted Shishito Peppers
.JPG) Shishito Peppers are Japanese Green Peppers. These peppers are usually served at Izakaya-Japanese style pubs. They are super simple to prepare and quite delicious!
Shishito Peppers are Japanese Green Peppers. These peppers are usually served at Izakaya-Japanese style pubs. They are super simple to prepare and quite delicious!Ingredients
Shishito Green Pepper
Kosher Salt
Olive Oil
Heat a little oil in a frying pan or wok. Add the peppers when the oil is hot, but not smoking. Stir fry for several minutes until part of the skin of the peppers chars and turns black.
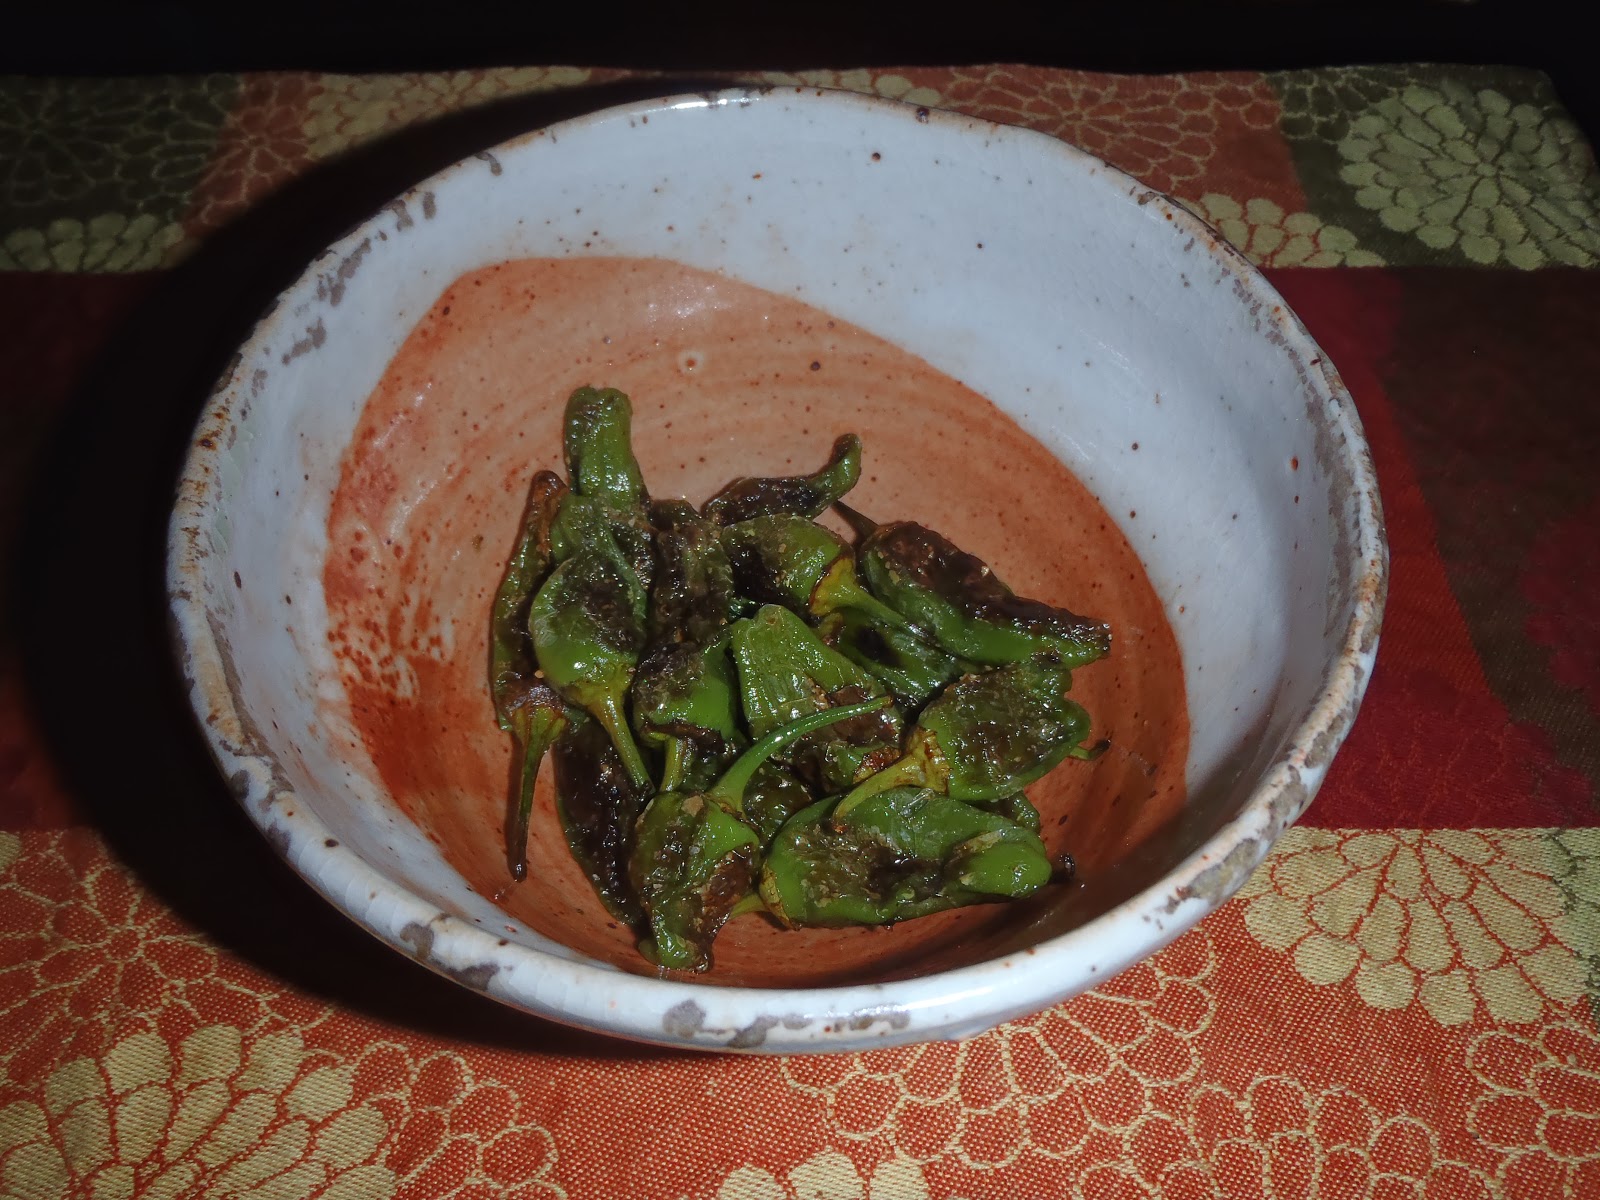 Remove from heat. Sprinkle with salt, mix and serve in a bowl.
Simple and delicious!
Thursday, November 8, 2012
Soy Braised Chicken Wings
.JPG)
Ingredients
1 lbs chicken wings
1 cup soy sauce
1 cup of Apple Brandy or Applejack (Regular brandy will work too)
1 tablespoon peeled, sliced ginger
3 scallions, chopped
7-8 garlic cloves, whole with skin removed
2 mikan (tangerines)
Honey'd preserved figs 5 tablespoons
Fig Balsamic Vinegar 1 tablespoon
Brown Sugar (optional)
Procedure
Remove the chicken wings from the refrigerator and allow to come to room temperature.
Mix the soy sauce, Apple Brandy, ginger, garlic and scallions together in a wok.
Wash and peel the mikan. Add the peels to the wok.
Add the mikan to a food processor. Remove the seeds from the mikan and discard. Blend the mikan (sans skin and seeds). Add the pureed mikan to the wok. Add the ginger and garlic to the wok.
Over medium heat, bring the soy sauce mixture to a gentle boil.
Add the honey'd preserved figs and gently mix the figs into the soy sauce.
Add the Fig Balsamic Vinegar to the soy sauce mixture. Taste. Adjust accordingly--if the soy sauce is too salty and powerful, add more brandy, figs, fig balsamic vinegar or brown sugar.
Add the chicken wings to the wok. Cover, reduce the heat to medium-low and cook until the chicken is fully cooked, about 45 minutes to 1 hour. The internal temperature needs to reach 165.
Thursday, October 25, 2012
Steak on the barbie
.JPG) I ordinarily don't eat steak--it's expensive and all that meat can't possibly be good for you if you have it regularly. But once in a while really is a treat! I found these steaks on sale at our local Whole Food on their Friday sale.
I ordinarily don't eat steak--it's expensive and all that meat can't possibly be good for you if you have it regularly. But once in a while really is a treat! I found these steaks on sale at our local Whole Food on their Friday sale.This is an Italian twist on a traditional steak. I got the recipe from Chef Fabio Viviani---You can watch his video on steak here.
A tip I learned from Chef Viviani:
1) Don't salt your steak before cooking it. Instead, you freshly cracked pepper. A lot of pepper. The cracked pepper will help create a thin layer on the steak which will seal in the juices. The salt with draw out the moisture in the meat and dry out your steak. If you want salt, add it at the very end!
2) Use a fresh branch of rosemary as your basting brush. Heat activates the oil in rosemary and really brings out its flavor. If you have some rosemary oil, use that!
3) Look for marbling in the steak. The marbling helps lock in the juices--so they will stay inside the steak and not leak out during the cooking process.
A few tips I learned along the way:
1) Bring you steak to room temperature before grilling. For this recipe, I made a mix of chopped garlic and olive oil. I then let the steak marinade in that for about 1 hour at room temperature.
2) Make sure your grill is clean and oiled. Noone wants the reminants of whatever what cooked on the grill two weeks ago in their food. Its best to clean the grill after your last grilling job, when the grills are hot, food doesn't stick as well.
3) Oil your grill before you add your meat. The best way to do this is to bunch up a paper towel and douse it in oil. Wrap it in one thin layer of aluminum foil and puncture the aluminum foil several times with a fork. Use a pair of tongs to brush the grill when it is hot with the oil.
2) Make sure your grill is nice and hot! When heating your coals, use a chimney starter--they are really inexpensive and work great. They take a little bit longer to heat up your charcoal, but it is much better--no one wants to taste lighter fluid on their food!
3) On that note, be sure to use natural charcoal. Some manufacturers will douse their charcoal in lighter fluid for an easy light...Don't but these brands.
 4) If you have any natural wood to burn it, use it! Natural wood works really well, and imparts a delicious flavor to meat! The best part is that if you use natural wood logs, they turn into charcoal as they burn, saving you a trip to the store. I will place two logs of wood on each end of the barbeque, and then add the hot coal in between. The heat of the coals will make the logs burn, so you get a good combination of flame and slow heat from the charcoal.
5) Use steak with the bone in. It will help lock in moisture.
Ingredients
1 steak
Freshly cracked pepper
Garlic
Olive Oil
1 rosemary stem
Fresh Thyme
Salt
Bring the steak to room temperature.
Drizzle the steak with olive oil on both sides. Massage the olive oil in.
Cover your steak with freshly cracked pepper. This pepper will help create a seal which will lock in the juiciness and flavors of the steak so be liberal with it.
Fire up your barbeque.
Cook on high heat for 7-8 mintues. Don't be constantly prodding the steak. Just close the cover and let it cook undisturbed.
After 7 minutes, add some fresh thyme to the top of the steak (the raw side) and flip the steak. Brush the top of the steak (the cooked portion) with the rosemary brush. Sprinkle some salt on the cooked side.
Place a meat thermometer inside the steak. The temperature needs to get to 145 F (62.7 C) for 15 seconds.
Cover and cook for another 7-8 minutes.
Once the steak is done, remove from heat and let it sit for 5 minutes or so. The internal heat will continue to cook the steak.
Serve with mashed potatoes, salad or sauted mushrooms. I found the flavor so intense from the wood fire and the rosemary, that the steak didn't need any seasoning at all.
Once you are done grilling, clean off the grill while the coals are still hot with a grill brush. Let the coals burn out naturally. The wood you used will have turned to charcoal, so you can use that charcoal the next time you barbeque.
Monday, October 22, 2012
Roasted Chicken in a Dutch Oven

The main difference I saw was that the meat cooked faster, and the bird was much more juicier. All of the moisture gets locked into the bird, and makes it really soft and tender. The next major benefit was that this really was a one pot meal. I roasted the chicken in the dutch oven with carrots, celery and fennel. I could store the chicken in the same Dutch oven in the refrigerator. When I was done with the chicken, I could make chicken stock directly in the Dutch oven, with the bones, carcass and the vegetables I used to roast the chicken.
.JPG)
This is a standard recipe for roasting a chicken. My recipe for roasting a chicken on Shokubi can be found here.
Bring the chicken to room temperature. Take a lemon and boil it in water for a few minutes, until it becomes soft. Prick it several times with a knife and stuff it into the chicken. Stuff with carrots, celery, fennel and onions. Pop a few garlic cloves under the skin and place on a be of carrots, celery and potatoes. Generously rub with olive oil, salt and pepper.
Roast the chicken at 400 F for 1 hour or so. After the chicken comes to the proper internal temperature, 160 F on a meat thermometer, remove the cover and let it roast for about 10 minutes more, or until the skin gets very crispy.
.JPG)
.JPG)
.JPG)
Monday, October 15, 2012
Turkey Stuffed Tofu

Ingredients
Extra Firm Tofu, 2 10 oz blocks
Filling
Ground Turkey, about 1/2 lbs (you can also use ground pork)
1 scallion, minced (use whole scallion, white and green parts)
1 teaspoon salt
2 teaspoon dry sherry
1/8 teaspoon ground white pepper
1 teaspoon cornstarch
Sauce
1/3 cup rich dark chicken stock
1 teaspoon soy sauce
2 teaspoon oyster sauce
1/2 teaspoon sugar
1.5 teaspoon cornstarch dissolved in 1 tablespoon of water
1/2 teaspoon black bean sauce (optional)
Directions
For the filling, mix all the ingredients and marinade for 20-30 minutes or up to 2 hours.

Wash and pat dry the tofu squares.
 Cut the tofu squares into triangles. To do this, take one tofu block and cut it in half lengthwise.
Take one of those halves and cut it into four triangles, by cutting a big X through the tofu block. Repeat with the other half of the tofu. If you are using 2 packs of tofu, you should end up with 16 tofu triangles.
 Take one of the triangles of tofu. With a sharp pairing knife, cut out a thin pocket on the long side of the tofu. Take the carved out tofu and use for another recipe. Repeat for the remaining tofu triangles. Reserve the scrapped out tofu for Mabo Tofu.

After the tofu ingredients have marinated, take on the tofu triangles, and stuff the tofu pocket with the turkey mixture. Be sure not to overstuff the tofu, it will break the tofu and ruin your stuffed tofu! It takes about 2 teaspoons of meat mixture. Repeat for the remaining tofu triangles.
You can fry these immediately, or keep them in the refrigerator for a few hours.
When you are ready to eat, heat 1 tablespoon of vegetable oil in a wok or cast iron skillet. When it gets hot, almost smoking, add the triangles, meat side down. Cook for 5-6 minutes total, turning the tofu to brown on each side. When all the sides are nicely browned remove from the wok and place on paper towels. Let any remaining oil drain off.
Wednesday, October 3, 2012
Honey'd Preserved Figs
I still had some figs left over from my last meal, Fig Balsamic Vinegar, and I didn't want them to go bad. At the same time, I didn't have any dishes I readily wanted to make with figs, so I decided to make a fig jam. I went online and found a recipe for Honey'd Preserved Figs, from a blog called Will Cook for Friends.
This turned out really good! I used some Hawaiian honey from the Big Island and it was so delicious!
This works great as a spread for toasted rustic bread! I am thinking about making some sort of ice cream with it.
Ingredients
1 lbs black mission figs or any other type
1 tablespoon fresh lemon juice
3 tablespoons honey
1/4 cup granulated sugar
Gently wash and stem the figs. Cut them into half or quarters and add them to a saucepan.
Add the remaining ingredients. Give them a good stir, its okay if you break down the figs a bit.
Let the figs marinate in the lemon juice, honey and sugar for 15 minutes.
Put the saucepan with the figs on medium heat, and cook for 7-10 minutes, stirring occasionally.
.JPG) I found stirring the figs with a large wooden pestle really does the trick! Continue stirring until the fruit begins to break down.
I found stirring the figs with a large wooden pestle really does the trick! Continue stirring until the fruit begins to break down.
.JPG) Reduce the heat to low. Continue to cook for 7-10 minutes more, or until the jam has thickened to your liking.
Reduce the heat to low. Continue to cook for 7-10 minutes more, or until the jam has thickened to your liking.
Spoon the preserves into a glass jar. They will stay in the refrigerator for a few weeks. Alternatively, you could can the fruits. Properly sealed jars can stay in a cool dark place for several months. Just be very careful with the canning process!
This turned out really good! I used some Hawaiian honey from the Big Island and it was so delicious!
This works great as a spread for toasted rustic bread! I am thinking about making some sort of ice cream with it.
Ingredients
1 lbs black mission figs or any other type
1 tablespoon fresh lemon juice
3 tablespoons honey
1/4 cup granulated sugar
Gently wash and stem the figs. Cut them into half or quarters and add them to a saucepan.
Add the remaining ingredients. Give them a good stir, its okay if you break down the figs a bit.
Let the figs marinate in the lemon juice, honey and sugar for 15 minutes.
Put the saucepan with the figs on medium heat, and cook for 7-10 minutes, stirring occasionally.
.JPG) I found stirring the figs with a large wooden pestle really does the trick! Continue stirring until the fruit begins to break down.
I found stirring the figs with a large wooden pestle really does the trick! Continue stirring until the fruit begins to break down..JPG) Reduce the heat to low. Continue to cook for 7-10 minutes more, or until the jam has thickened to your liking.
Reduce the heat to low. Continue to cook for 7-10 minutes more, or until the jam has thickened to your liking.Spoon the preserves into a glass jar. They will stay in the refrigerator for a few weeks. Alternatively, you could can the fruits. Properly sealed jars can stay in a cool dark place for several months. Just be very careful with the canning process!
Monday, October 1, 2012
Fig Balsamic Vinegar
.JPG) We recently got a bunch of figs from friends! Thank you very much! We were debating what to do with them.
We recently got a bunch of figs from friends! Thank you very much! We were debating what to do with them.I scoured the internet and found this recipe from a food blog called White on Rice. Its delicious! I have been using this as a dipping sauce for roasted chicken. I am thinking of other uses for it. It works great with toasted bread and goat cheese as well!
Ingredients
1 cup of fig pulp (I used Mission figs, but I think Brown Turkey would work too)
1 cup balsamic vinegar
1 teaspoon pure vanilla extract
Scoop out the fig pulp from the figs. I found a paring knife works best for this.
.JPG) In a saucepan, add the balsamic vinegar and fig pulp. Simmer on low heat for 30-45 minutes, or until the mixture reduces to about half. Give it a good stir every 5 minutes or so, to make sure the figs don't stick to the pan.
In a saucepan, add the balsamic vinegar and fig pulp. Simmer on low heat for 30-45 minutes, or until the mixture reduces to about half. Give it a good stir every 5 minutes or so, to make sure the figs don't stick to the pan..JPG) Allow the fig reduction to cool. Place the mixture in a food processor and blend thoroughly.
Allow the fig reduction to cool. Place the mixture in a food processor and blend thoroughly.The recipe from White on Rice called for straining the fig seeds out of the mixture, but I found the figs seeds were too small and just fell through my colander I would stay strain it if you have a really fine mesh colander--those seeds are small! Otherwise, just leave the seeds in.
Add a teaspoon of pure vanilla extract.
Store in a glass container in the fridge.
Tuesday, September 25, 2012
Pineapple Mint Shave Ice
Pineapple and Mint are best mates. This is a fantastic dessert for summer when fresh mint and pineapple are both in season!
Similar to my post yesterday on Shokubi, Pineapple Li Hing Mui Shave Ice, I was intending to make a pineapple mint sorbet, but it turned into a granita or Hawaiian Shave Ice.
It was still a little tasty, but when frozen it was rock hard! If you let this dish sit out for about 10 minutes, it gets softer and much easier to serve and eat! You can also scrape it straight out of the freezer if you are looking for more of a shave ice texture.
This was a super simple recipe to follow, as long as you have an Ice Cream Maker. We received a KitchenAid Ice Cream Maker Stand Mixer Attachment as a wedding gift, and it worked wonderful!
I am still experimenting with it. A few plausible theories I have as to why it didn't come out right:
1. I didn't have enough sugar in the mix. The pineapple had natural sugars in it, that this would be enough sweetness. I had tasted the mixture before freezing and after freezing, and it was plenty sweet. I had added only 2 tablespoons of sugar to this dish. By contrast, when I was making a Lemongrass Mint sorbet a few months back, I had added 1.5 cups of sugar to 1 cup of water.
So for the same volume of liquid, 1.5 cups of sugar is going to give you a very soft sorbet, and 2 tablespoons is going to give you a very hard granita. The hypothesis I am arriving at is that the sugar is providing a textural element as well, making it softer somehow. Perhaps the sugar is prevents the liquid element from forming ice crystals, making it softer.
2. I didn't seep or boil the liquid. When I made a Lemongrass Mint sorbet a few months back, I had seeped the flavor elements (mint and lemongrass) in boiling water with sugar for 20 minutes. This allowed the flavor to infuse into the liquid. Obviously, the heat released some natural oils in the lemongrass, and possibly the mint. Maybe by heating the liquid and then adding the sugar, the sugar dissolved into the mixture, changing itself structurally. Any chemists out there who can help me confirm this hypothesis?
3. The pineapple is making the dish too chunky. Somehow the pineapple is interfering with the formation of ice crystals, making the whole thing hard. I don't know the science behind this...Any readers out there chemists? I am experimenting with blending the pineapple in the food processor, then squeezing out the liquid with a cheesecloth. This will impart the flavor of pineapple. Then after everything has gone through the ice cream maker, I add back in a few spoonfuls of the pineapple.
In any event, I found that if I let this granita sit outside the freezer for about 5-8 minutes, the ice crystals loosen up and it is easier to spoon out. Either way, it tastes good.
I will give the recipe for what I did, and then make recommendations for how I would improve the recipe for next time.
This granita, as it is, also works wonders as a base for mixed drinks. Like a Pineapple Mint Mojito!
Ingredients, Initial Run (what I did)
Pineapple, cut and cored, 3.5 cups
Fresh Mint Leaves, 1 large handful, washed
Sugar 2 tablespoons
Procedure, Initial Run (what I did)
Place your ice cream maker's bowl and paddle in the freezer and let it freeze completely (at least 24 hours).
Cut your pineapple into cubes, as outlined in my blog post Cutting a Pineapple. Cut and remove the core. You can either toss the core or makes something else with it. I place my cores in a glass jar with vodka and make pineapple infused vodka!
.JPG) Add the Pineapple, mint leaves and sugar to a food processor. Blend until smooth.
Add the Pineapple, mint leaves and sugar to a food processor. Blend until smooth.
Set up the Ice cream bowl and paddle on your KitchenAid (see my blog post Lemongrass Granita to learn how to set up your KitchenAid Ice Cream Maker).
Churn for 7-12 minutes on speed 1. Remove and pour into a plastic container. Freeze.

The texture of this batch wasn't as hard as the Pineapple Li Hing Mui Shave Ice, but it was still not smooth at all. It was still rather hard, and I needed to let it sit outside the freezer at room temperature for 5-6 minutes, before serving it.
Ingredients, 2nd Run
Pineapple, cut and cored, 3.5 cups
Fresh Mint Leaves, 1 large handful, washed
Sugar 1.5 cups
1 cup boiling water
Procedure, 2nd Run
Place your ice cream maker's bowl and paddle in the freezer and let it freeze completely (at least 24 hours).
Cut your pineapple into cubes, as outlined in my blog post Cutting a Pineapple. Cut and remove the core. You can either toss the core or makes something else with it. I place my cores in a glass jar with vodka and make pineapple infused vodka!
Add the pineapple cubes to your food processor and blend until smooth. Strain the pineapple through a fine sieve or cheesecloth. Discard the solids or place the solids in a glass jar of vodka to seep for flavored vodka. Keep the liquid portion in a separate bowl.
In a separate bowl, add sugar and boiling water. Stir till the sugar is dissolved. Add the liquid pineapple and give it a good stir again. Place a kitchen towel over the mixture and let seep for 20 minutes.
Cool.
Set up the Ice cream bowl and paddle on your KitchenAid (see my blog post Lemongrass Granita to learn how to set up your KitchenAid Ice Cream Maker).
Churn for 7-12 minutes on speed 1. Remove and pour into a plastic container. Freeze.
Ingredients, 3rd Run
Fresh Pineapple, cut and cored, 3.5 cups
Fresh Mint Leaves, 1 large handful, washed
3 cups sugar
1 cup of boiling water
Procedure, 3rd Run
Place your ice cream maker's bowl and paddle in the freezer and let it freeze completely (at least 24 hours).
Cut your pineapple into cubes, as outlined in my blog post Cutting a Pineapple. Cut and remove the core. You can either toss the core or makes something else with it. I place my cores in a glass jar with vodka and make pineapple infused vodka!
Add mint, sugar and the pineapple to a large bowl. With your hands or a large pestle, squish the pineapple and mint into the sugar, breaking up the pineapple and releasing some of the pineapple juices and mint oils. Let the mixture sit for 10 minutes, allowing the pineapple to release some of its juices. Add the boiling water. Stir until the sugar is dissolved. Cover with a kitchen towel and let seep for 20 minutes or until cool.
Strain the mixture with a colander, separating the solids from the liquids. Place the liquid portion into the refrigerator.
Take the solids parts and place in a food processor. Blend until smooth.
Strain the now liquid pineapple with a cheesecloth, adding the liquid portion to the other part. Use the solid portion to flavor vodka or throw away.
Cool the mixture and run through an ice cream maker, as outlined above.
I am tempted to say the third one will give the best consistency in terms of texture, but it will have the most sugar! Shokubi Readers, why don't your try making a batch and let me know how it turns out! Either post on my blog (see bottom of the page) or give me a holler on my Twitter account.
Happy cooking! (And eating!!)
Monday, September 24, 2012
Pineapple Li Hing Mui Shave Ice

I have a confession to make to my Shokubi Readers! Disaster struck with this recipe! Well, maybe not a disaster, but it didn't turn out how I wanted it to! I was intending to make a beautiful soft sorbet, but it turned into this super rock hard chunk of ice. It tastes really good, but you will almost break your spoon trying to eat it. I had to scrape the edge of a spoon to get it out of the container! It turned into more of a Granita or shave ice than a sorbet!
I got a KitchenAid Ice Cream Maker attachment for my KitchenAid mixer a few months back for our wedding. I was dying to try it out, but had to wait until after the wedding...no need for extra calories or pounds.
I tried this recipe two times--once with this Pineapple Li Hing Mui granita, and the next day with Mint-Pineapple granita. Both times, I was aiming for a sorbet, but fell far from the mark. The taste was good, but both times it came out super hard.
I am still experimenting with it. A few plausible theories I have as to why it didn't come out right:
1. I didn't have enough sugar in the mix. At the time, I was thinking that because the Li Hing Mui was essentially sugar with licorice flavoring, and the pineapple had natural sugars in it, that this would be enough sweetness. I had tasted the mixture before freezing and after freezing, and it was plenty sweet. I had added only 2 tablespoons of sugar to this dish. By contrast, when I was making a Lemongrass Mint sorbet a few months back, I had added 1.5 cups of sugar to 1 cup of water.
So for the same volume of liquid, 1.5 cups of sugar is going to give you a very soft sorbet, and 2 tablespoons is going to give you a very hard granita. The hypothesis I am arriving at is that the sugar is providing a textural element as well, making it softer somehow. Perhaps the sugar is prevents the liquid element from forming ice crystals, making it softer.
2. I didn't seep or boil the liquid. When I made a Lemongrass Mint sorbet a few months back, I had seeped the flavor elements (mint and lemongrass) in boiling water with sugar for 20 minutes. This allowed the flavor to infuse into the liquid. Obviously, the heat released some natural oils in the lemongrass, and possibly the mint. Maybe by heating the liquid and then adding the sugar, the sugar dissolved into the mixture, changing itself structurally. Any chemists out there who can help me confirm this hypothesis?
3. The pineapple is making the dish too chunky. Somehow the pineapple is interfering with the formation of ice crystals, making the whole thing hard. I don't know the science behind this...Any readers out there chemists? I am experimenting with blending the pineapple in the food processor, then squeezing out the liquid with a cheesecloth. This will impart the flavor of pineapple. Then after everything has gone through the ice cream maker, I add back in a few spoonfuls of the pineapple.
In any event, I found that if I let this granita sit outside the freezer for about 5-8 minutes, the ice crystals loosen up and it is easier to spoon out. Either way, it tastes good.
I will first write how I made this granita, then follow it up with how I would do it a second time.
This granita, as it is, also works wonders as a base for mixed drinks. Like a Li Hing Mui Mojito!
Ingredients Initial Run (what I did)
1 Fresh Pineapple, cut into cubes (about 3 1/4 cups)
Li Hing Mui Powder, 2 tablespoons
Procedure: Initial Run
Place your ice cream maker's bowl and paddle, in the freezer and let it freeze completely (at least 24 hours).
Cut your pineapple into cubes, as outlined in my blog post Cutting a Pineapple. Cut and remove the core. You can either toss the core or makes something else with it. I place my cores in a glass jar with vodka and make pineapple infused vodka!
Add the pineapple cubes to your food processor and blend until smooth. Add the Li Hing Mui powder. Blend again until the Li Hing Mui Powder is mixed thoroughly. Taste. Add more Li Hing Mui powder until you get a flavor profile you enjoy. The whole mixture should look orange.
Set up the Ice cream bowl and paddle on your KitchenAid (see my blog post Lemongrass Granita to learn how to set up your KitchenAid Ice Cream Maker).
.JPG) Pour the Pineapple & Li Hing Mui mixture into the bowl. Churn for 7-12 minutes on speed 1. Remove and pour into a plastic container. Freeze.
Pour the Pineapple & Li Hing Mui mixture into the bowl. Churn for 7-12 minutes on speed 1. Remove and pour into a plastic container. Freeze.2nd Run
Ingredients 2nd Run
1 Fresh Pineapple, cut into cubes (about 3 1/4 cups)
1.5 cups sugar
1 cup of boiling water
Li Hing Mui Powder, 2 tablespoons
Procedure: 2nd Run
Place your ice cream maker's bowl and paddle in the freezer and let it freeze completely (at least 24 hours).
Cut your pineapple into cubes, as outlined in my blog post Cutting a Pineapple. Cut and remove the core. You can either toss the core or makes something else with it. I place my cores in a glass jar with vodka and make pineapple infused vodka!
Add the pineapple cubes to your food processor and blend until smooth. In a separate bowl, add sugar and boiling water. Stir till the sugar is dissolved. Add the pineapple and give it a good stir again. Place a kitchen towel over the mixture and let seep for 20 minutes.
Strain the mixture through a fine sieve or cheesecloth. Discard the solids or place the solids in a glass jar of vodka to seep for flavored vodka.
Add the Li Hing Mui powder to the liquid.
Take the liquid and run it through an Ice Cream maker as outlined above.
3rd Run
Ingredients 3rd Run
1 Fresh Pineapple, cut into cubes (about 3 1/4 cups)
3 cups sugar
1 cup of boiling water
Li Hing Mui Powder, 4 tablespoons
Procedure: 3rd Run
Place your ice cream maker's bowl and paddle in the freezer and let it freeze completely (at least 24 hours).
Cut your pineapple into cubes, as outlined in my blog post Cutting a Pineapple. Cut and remove the core. You can either toss the core or makes something else with it. I place my cores in a glass jar with vodka and make pineapple infused vodka!
Add sugar and the pineapple to a large bowl. With your hands or a large pestle, squish the pineapple into the sugar, breaking up the pineapple and releasing some of its juices. Let the mixture sit for 10 minutes, allowing the pineapple to release some of its juices. Add the boiling water. Stir until the sugar is dissolved. Cover with a kitchen towel and let seep for 20 minutes or until cool.
Strain the mixture with a cheesecloth, separating the solids from the liquids. Add the Li Hing Mui Powder to the liquid part and stir to incorporate. Place the liquid portion into the refrigerator. Discard the solids or place in a glass jar with vodka.
Cool the mixture and run through an ice cream maker, as outlined above.
.JPG)
Friday, September 21, 2012
Thai Green Curry with Avocado

Ingredients
For the Avocado Base thickening agent:
1 avocado
Cooking oil
1 tablespoon green curry paste, or to taste (Mae Ploy is my preferred brand)
1/2 cup coconut milk
For the green curry base:
1.5 cups coconut milk (1 can)
1 tablespoon green curry paste, or to taste (Mae Ploy is my preferred brand)
Rich Dark Chicken Stock, 1/4 cup
2 tablespoons fish sauce
2 tablespoons white sugar
1/2 teaspoon ground turmeric
1 lemongrass stalk, bruised and cut into 1 inch pieces
2 Kaffir lime leaves, cut into thin slivers (use a pair of scissors)
2 Thai, Chinese or Japanese eggplants, cut into cubes (don't use Italian eggplants)
2 red tomatoes, cut into wedges
1 lbs boneless, skinless chicken breasts, cut into cubes
15 fresh basil leaves, cut in half
Fresh cilantro for garnish
Directions
Avocado based thickening agent
.JPG) Cut the avocado in half and remove the stone. The best way to remove the spoon is to hold the avocado half in your left hand and with your right hand make an incision into the stone using a knife. Turn the stone counter clockwise and it should pop out. Make incisions vertically and horizontally into the flesh with a pairing knife. Taking a spoon, peel out the avocado into a food processor (I use Cuisinart).
Cut the avocado in half and remove the stone. The best way to remove the spoon is to hold the avocado half in your left hand and with your right hand make an incision into the stone using a knife. Turn the stone counter clockwise and it should pop out. Make incisions vertically and horizontally into the flesh with a pairing knife. Taking a spoon, peel out the avocado into a food processor (I use Cuisinart)..JPG)
In a wok, heat some oil on high until hot but not smoking. Add the curry paste, it will sizzle a bit so be careful. Stir fry it for 1-3 minutes, or until the curry paste releases its aroma. Add 1/2 cup or less of coconut milk into the wok. I will usually pour a little coconut milk from the can into the wok and spread it around so it evenly and thinly covers the side of the wok. It is easier to add a little coconut milk at a time and adjust upwards than it is to take coconut milk out of the wok. The more coconut milk you add, the more the flavor will be diluted. So less is more! Mix the coconut milk in with the curry paste until it is dissolved. Keep a close eye on the coconut milk, you do not want it to boil. Adjust the temperature downward to prevent the coconut milk from boiling. You want to make sure that the coconut milk takes on a nice green color, mixing thoroughly with the curry paste. Taste. Add more curry paste if you like it spicier.
.JPG) Transfer to the food processor with the avocado in it. Thoroughly blend the curry paste, coconut milk and the avocado in the food processor, until the mixture is very smooth and thick.
Transfer to the food processor with the avocado in it. Thoroughly blend the curry paste, coconut milk and the avocado in the food processor, until the mixture is very smooth and thick..JPG)
.JPG) Transfer the blended avocado back to the wok and heat for a few seconds, again making sure not to bring the coconut milk to a boil. Transfer to a smaller bowl. This is now your thickening agent!
Transfer the blended avocado back to the wok and heat for a few seconds, again making sure not to bring the coconut milk to a boil. Transfer to a smaller bowl. This is now your thickening agent!From here, it is just like making regular green curry found on Shokubi!
Green Curry Base:
Heat the wok and add a swig of coconut milk, again just enough to thinly coat the wok. Adjust heat downward to ensure that the coconut milk doesn't start to boil.
Add 1 tablespoon of green curry paste and lemongrass and mix it in with the coconut milk. Taste, and add more green curry paste to make it spicier.
Add homemade chicken stock, fish sauce, turmeric and lime leaves.
Add the eggplant and let the eggplant cook until it is cooked. I like my eggplant soft, but with a little structure.
 Add the chicken and let it cook until white, around 3-5 minutes.
Add the tomatoes and let them start to cook. The tomatoes will release their juices, thinning out your curry. Add the remainder of your coconut milk.
 Now for the avocado thickening agent: Push all your vegetables and chicken to the side of the wok, allowing the liquid to pool in the center. Add a spoonful of the blended avocado and mix into the green curry sauce. Taste. If it is too thin, continue to add more blended avocado until you reach the consistency you like. I like my curry creamy enough so it sticks onto the meat and vegetables, but runny enough that it still feels like a curry.
.JPG)
 Serve with hot freshly cooked rice!
Subscribe to:
Posts (Atom)